How to Air Squat Properly & Avoid Common Mistakes | Noah Ohlsen
Air squats are one of the most essential movements you can do. It’s a great exercise on its own, but it’s also the foundation for many other exercises such as the back squat, front squat, and thruster. Plus, with no equipment required, it’s an exercise you can do anywhere.
Noah Ohlsen explains how to air squat properly, avoid common mistakes, and recover post-workout. Doing air squats correctly is so important for preventing injuries and building a base for a variety of other movements.
How to Air Squat Properly
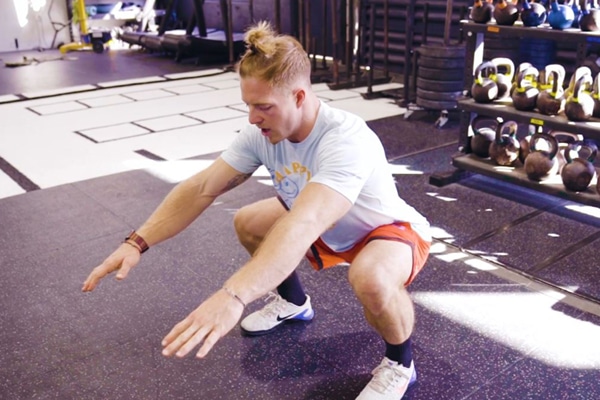
- Set your feet anywhere from hip to shoulder width apart, with your toes pointed slightly outward. Think about gripping the ground with your toes.
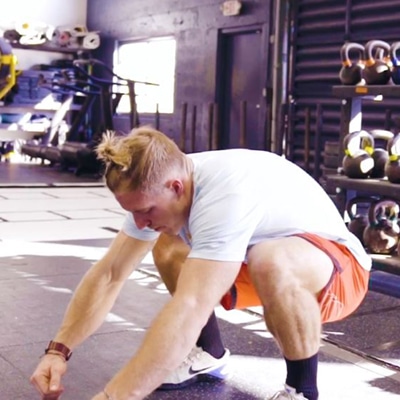
- Once your feet are set, initiate the movement by keeping your chest tall and pushing your hips back slightly, sinking your body down until your hips are just below knee level.
- Stand all the way back up, giving your core, glutes and legs a squeeze to make sure you’ve reached a good finishing position.
- As you continue to do more air squats, remember to keep that tension as you start to go back down and then squeeze again as you reach the top position.
Benefits of the Air Squat
Air squats are an awesome way to work your entire lower body. Your calves, quads, hamstrings, and glutes are the main muscles activated, but air squats also engage your core. If you do them at a fast enough pace, you can even elevate your heart rate and get breathing pretty heavily.
Mistakes to Avoid
Although air squats are such a simple movement, there are many things that can go wrong. A few things you want to avoid are:

Mistake 1: Weight on Toes Mistake 2: Buckled Knees Mistake 3: Rounded Back
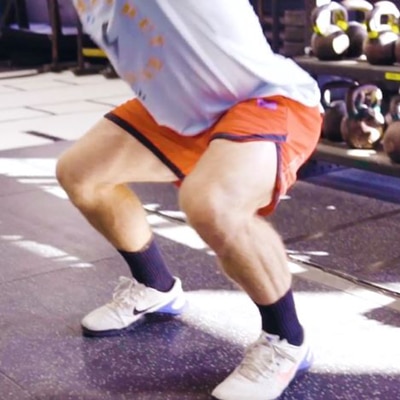
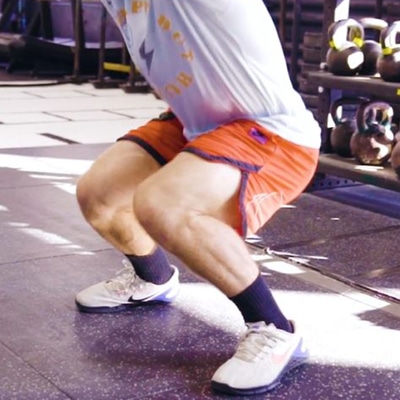
- Putting your weight forward and coming up onto your toes as you squat down. Instead, keep your foot flat and make sure your weight is back on your heels. This will help prevent added pressure on your knees.
- Tracking your knees incorrectly. Make sure your knees track out over your toes. As you stand up, don’t let them buckle in.
- Rounding your back while going into the bottom squat position. It’s important to keep your chest tall during the movement. This will help prevent a rounded back.
Following these steps and tips from Noah will get you close to a perfect air squat.
Recovery from Air Squats
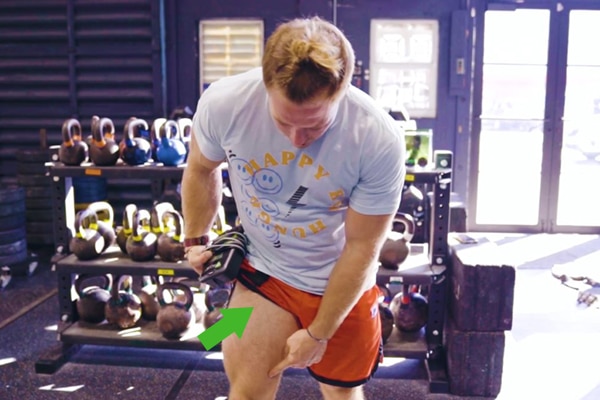
There are some killer workouts you can do based on the air squat. When you do high volume air squats, you will likely find that your legs are very sore the following day, so recovery becomes even more important. Noah Ohlsen uses Marc Pro to ensure he’s recovered from workouts and training. After an air squat workout, his favorite spot to use Marc Pro is on his quads. With Marc Pro, pad placement doesn’t need to be exact, but Noah has found the best results with placing one pad near the bottom of the vastus medialis and another near the upper end of the sartorious muscle (locations pointed out in image). Marc Pro is proven to enhance the recovery process, eliminate muscle soreness/fatigue, and prevent overuse injuries. Click here to learn more about how Marc Pro works.
You may also be interested in:
Pistol Tips: The Ultimate Single Leg Squat